Home / Troubleshooting / Decommissioning & Repurposing ONTAP
Decommissioning & Repurposing ONTAP
Retiring a node, a shelf, or a whole cluster — or handing used gear to a homelab — has a specific order of operations. Get it wrong and you lose licenses, get stuck on audit volumes, or hand a support headache to the next owner. This runbook covers the full lifecycle: backup, removal, sanitization, and repurposing.
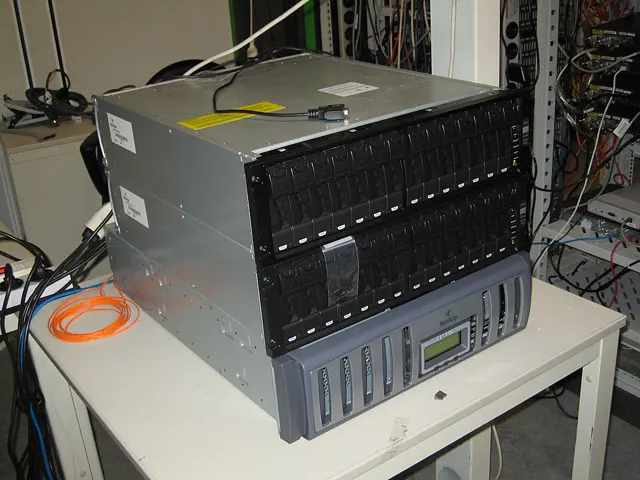
1. Phase 0 — Plan and back everything up first
Before any hardware moves, capture the configuration and the license picture. You cannot rebuild either from memory.
# Full configuration backup (to a location NOT on this system!)
system configuration backup create -node * -type full
system configuration backup show
# License inventory — record every serial number before it disappears
system license show
# What data still lives here? Who needs to sign off before it is destroyed?
volume show -fields volume,vserver,aggregate,used,percent-used
# AutoSupport off so the soon-to-be-dead system stops filing cases
system node autosupport modify -node * -state disabled- Licenses are tied to the cluster/system identity. After a clean-config re-initialization the cluster gets a new identity and the old entitlements do not follow — you must re-apply them from your NetApp account portal (or the original entitlement file). Keep a copy of
system license showoutput and the entitlement file with the decommission paperwork. - Configuration backups are node-scoped (
-node *covers all); copy the generated files off-box immediately — they are useless if they die with the system.
2. Phase 1 — Quiesce data and finalize replication
Clients stop first, then the replication layer, then the storage:
- Stop application writes (maintenance window, unmount NFS/SMB, offline the VMs).
- Final SnapMirror update so the destination is current, or break the relationship cleanly if the destination is now the source of truth:
snapmirror update -destination-path svm_dst:vol1thensnapmirror break -destination-path svm_dst:vol1— see the SnapMirror guide. - Take a final snapshot as a belt-and-braces recovery point:
snapshot create -vserver vs1 -volume vol1 -snapshot pre-decom. - Document the SVM/IP space/network dependencies so a later audit can answer "what was this?"
3. Phase 2 — Remove the node or cluster cleanly
Removing a node from a healthy cluster is a supported operation; removing it from a broken one is where the stuck-volume stories come from.
# Pre-flight: no volumes/SVMs left that live on this node
volume show -node node2 -fields volume,vserver,aggregate,state
# On the surviving node, remove the node from cluster membership
cluster remove-node -node node2 -skip-lif-migration false
# Or halt it for a maintenance-style removal:
system node halt -node node2 -reason "decommissioning"vserver audit for file-access logging) is not deletable while auditing is enabled, and an undeletable volume blocks node removal. Disable auditing first, then delete the volume: vserver audit disable -vserver vs1, then volume delete -vserver vs1 -volume vs1_audit_vol (names vary). Same pattern applies to any volume with an active consumer — SnapMirror sources, SnapVault destinations, Vault secondaries, and clone parents all refuse deletion until their relationships are broken.
4. Phase 3 — Sanitize data before the gear leaves
If the disks (or the whole node) are leaving your control, sanitize them. For FIPS/SED (NSE) disks, a crypto-erase is fast and complete; for others use secure erase or physical destruction.
# Verify which disks are self-encrypting (NSE) — crypto-erase is an option
storage disk show -fields disk,is-fips-certified,is-self-encrypting
# Secure erase (ONTAP 9.7+, advanced privilege) — DESTROYS ALL DATA on the disks
set -privilege advanced
storage disk secure-erase -disk <list-of-disks>
set -privilege admin- Boot-menu alternative: on the node console, the boot menu's "Clean configuration and initialize all disks" option wipes the configuration and reinitializes every disk (destructive — this is the "factory reset" path). The "Clean configuration and initialize node" option resets the cluster config but keeps disk data — that is the repurpose-a-node path, and it is also where you lose your licenses (Phase 0's backup pays off here).
- Secure erase only works on disks ONTAP can see; disks that are missing/broken need physical destruction or a vendor tool.
- Records: keep a certificate-of-destruction style log (serial numbers + method) — many orgs require it for audit.
5. Phase 4 — Repurposing used shelves and disks
Used NetApp shelves on a different system — a very common homelab move — mostly works, with caveats:
- Firmware first: the shelf's IOM firmware must be compatible with the receiving system. ONTAP can usually upgrade shelf firmware from the new system (
system node hardware shelf showto identify, then the firmware-update flow) — but check the target release's support matrix before expecting it to work. - Ownership is per-cluster: disks owned by the old cluster appear foreign to the new one. Newer ONTAP can reassign ownership non-destructively — verify
storage disk reassign(9.9.1+) prerequisites for your release; the classic path is to let the new system take ownership during initialization. - Supportability: used/third-party-resold NetApp gear is supportable only under NetApp's used-equipment rules (genuine NetApp parts, correct firmware, valid support contract). A shelf bought from a random reseller may work perfectly and still be unsupported — check before you bet production on it.
- Homelab reality: unsupported but functional is fine for a lab; just don't confuse "works" with "NetApp will help you when it doesn't".
6. Phase 5 — Close the loop
- Remove the system from Active IQ / monitoring / alerting (not just AutoSupport — any OpsRamp-style watchers too).
- Update DNS, CMDB, and any scripts that referenced its LIFs or management IPs.
- Retain the configuration backup + license inventory per your retention policy (often 1–3 years for audit).
- If the node is being returned under a maintenance contract, follow the vendor RMA/return process for the serial number.
cluster remove-node fails on a partially-dead node, or you need the documented secure-erase/RMA procedure for your exact platform and ONTAP release.
Related: aggregate capacity · hardware lineup · volume space exhaustion · ← All troubleshooting guides